Blooket is an innovative educational platform that combines the excitement of gaming with the rigor of learning. It allows educators to create custom learning activities tailored to their students’ needs, making lessons both engaging and effective. This guide will walk you through the process of creating custom learning activities on Blooket, ensuring you can harness its full potential to enhance your teaching strategy.

Why Use Custom Learning Activities on Blooket?
Engagement
Custom activities on Blooket are designed to captivate students’ attention, making learning a fun and interactive experience.
Flexibility
With Blooket, teachers can tailor activities to align with their curriculum and address specific learning objectives, ensuring that every lesson is relevant and effective.
Real-Time Feedback
Blooket provides immediate feedback, helping students understand their mistakes and learn from them, while also allowing teachers to monitor progress.
Variety of Game Modes
Blooket offers multiple game modes that cater to different learning styles, ensuring that all students can participate and benefit from the activities.
Step-by-Step Guide to Creating Custom Learning Activities
1: Sign Up or Log In
- Visit the Blooket Website: Go to www.blooket.com.
- Sign Up or Log In: If you don’t have an account, click “Sign Up” and select the “Teacher” option. If you already have an account, simply log in using your credentials.
2: Access the Dashboard
Once logged in, you will be directed to the Blooket Dashboard. This is your control center where you can manage your activities, create new games, and track student progress.
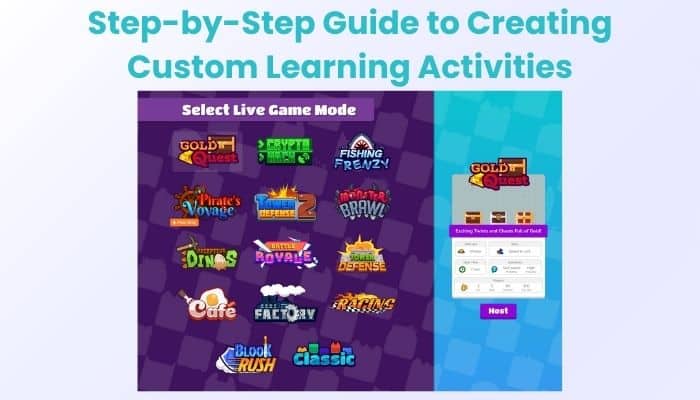
3: Create a New Game
- Click on “Create”: On the dashboard, click the “Create” button to start a new game.
- Choose a Game Mode: Blooket offers several game modes, such as Quiz Show, Match Game, and Tower Defense. Select the mode that best fits your learning objectives.
- Title and Description: Give your game a title and provide a brief description to help students understand the objective of the activity.
4: Add Questions
- Question Format: Choose the type of questions you want to include—multiple-choice, true/false, or fill-in-the-blank.
- Enter Questions: Input your questions and provide the correct answers. You can also add images to make the questions more engaging.
- Set Points and Time Limits: Assign points for correct answers and set time limits for each question to increase the challenge.
5: Customize Game Settings
- Game Settings: Customize various settings such as the number of questions, the order of questions (random or sequential), and whether hints are provided.
- Themes and Music: Select themes and background music to make the game visually appealing and immersive for students.
6: Save and Host
- Save the Game: Once you have added all your questions and customized the settings, save the game.
- Host the Game: Click on “Host” to generate a unique game code. Share this code with your students so they can join the game.
7: Monitor and Assess
- Real-Time Monitoring: During the game, monitor students’ progress in real time through the dashboard.
- Analytics and Reports: After the game, use Blooket’s analytics to review student performance. This data can help you identify areas where students may need additional support.
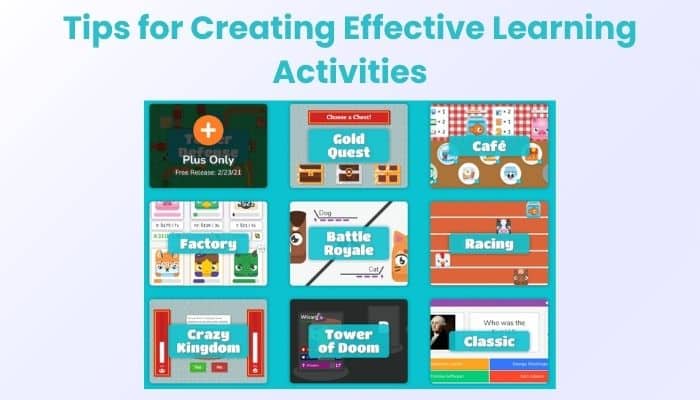
Tips for Creating Effective Learning Activities
Align with Learning Objectives
Ensure that your questions and activities are aligned with the learning objectives of your lesson. This helps reinforce key concepts and ensures that the activity is educationally valuable.
Use a Variety of Question Types
Incorporate different types of questions (multiple-choice, true/false, fill-in-the-blank) to cater to various learning styles and keep the activity engaging.
Encourage Collaboration
Consider creating activities that require students to work in teams. This promotes collaboration and helps build teamwork skills.
Regular Updates
Regularly update your games with new questions and topics to keep the content fresh and relevant. This also prevents students from memorizing answers from previous sessions.
Solicit Feedback
Ask for feedback from your students on the games you create. Use their input to improve future activities and ensure they are both fun and educational.
Conclusion
Creating custom learning activities on Blooket is a powerful way to enhance your teaching strategy and engage your students. By following this guide, you can create interactive and educational games that make learning enjoyable and effective. With its variety of game modes, customization options, and real-time feedback, Blooket is an invaluable tool for modern educators.